Ceylon + jOOQ = <3
So you want to try Ceylon on a new side project, but don’t feel like writing yet another boring command line application? In this article, I will show you how to set up a new Ceylon application that uses jOOQ seamlessly. We will see how easy it is to use Ceylon’s Java interoperability, and how easy it is to customize jOOQ and adapt it to Ceylon’s conventions. The sample application will use an existing database.
Creating a new project
The first step is to create a project in Ceylon IDE. We will create two Ceylon modules:
gen.example.jooqwill contain classes generated by jOOQ’s code generatorexample.jooqwill contain “actual” code that uses those generated classes to query our existing database
Adding dependencies to jOOQ
Since jOOQ provides Maven dependencies, we will use Ceylon’s Maven support. In the project settings, under Ceylon Build > Module Repositories we will use Add Maven Repository... to configure our local m2 repo.
Now we can add dependencies to jOOQ, to Java and to ceylon.interop.java since the code will be generated in Java:
module gen.example.jooq "1.0.0" {
    shared import "org.jooq:jooq" "3.6.0";
    shared import "org.jooq:jooq-meta" "3.6.0";
    import "org.jooq:jooq-codegen" "3.6.0";

    shared import java.base "8";
    import java.jdbc "8";
    import javax.annotation "8";
    import ceylon.interop.java "1.1.1";
}
Some of the imports are shared because they will be reused in example.jooq, whereas the others are here for internal use only. The other module.ceylon will look like this:
module example.jooq "1.0.0" {
    import gen.example.jooq "1.0.0";

    import "mysql:mysql-connector-java" "5.1.36";
    import "com.zaxxer:HikariCP-java6" "2.3.9";
}
Note that we also import a MySQL driver and HikariCP to connect to our MySQL database.
Generating classes
We will use MySQL’s Sakila sample database. Once the database is downloaded and installed, generating our model classes consists of creating a configuration file named jooq-config.xml, then invoking org.jooq.util.GenerationTool.
Here’s how jooq-config.xml looks like:
<?xml version="1.0" encoding="UTF-8" standalone="yes"?>
<configuration xmlns="http://www.jooq.org/xsd/jooq-codegen-3.6.0.xsd">
  <!-- Configure the database connection here -->
  <jdbc>
    <driver>com.mysql.jdbc.Driver</driver>
    <url>jdbc:mysql://localhost:3306/sakila</url>
    <user>root</user>
    <password></password>
  </jdbc>

  <generator>
    <name>org.jooq.util.DefaultGenerator</name>

    <database>
      <name>org.jooq.util.mysql.MySQLDatabase</name>
      <inputSchema>sakila</inputSchema>
      <includes>.*</includes>
    </database>

    <target>
      <packageName>gen.example.jooq</packageName>
      <directory>./source</directory>
    </target>

    <generate>
    	<pojos>false</pojos>
    	<daos>false</daos>
    </generate>
  </generator>
</configuration>
The important thing to configure is the output directory: files will be generated in the source directory, under the package gen.example.jooq, this way they will be automatically included in the Ceylon module:
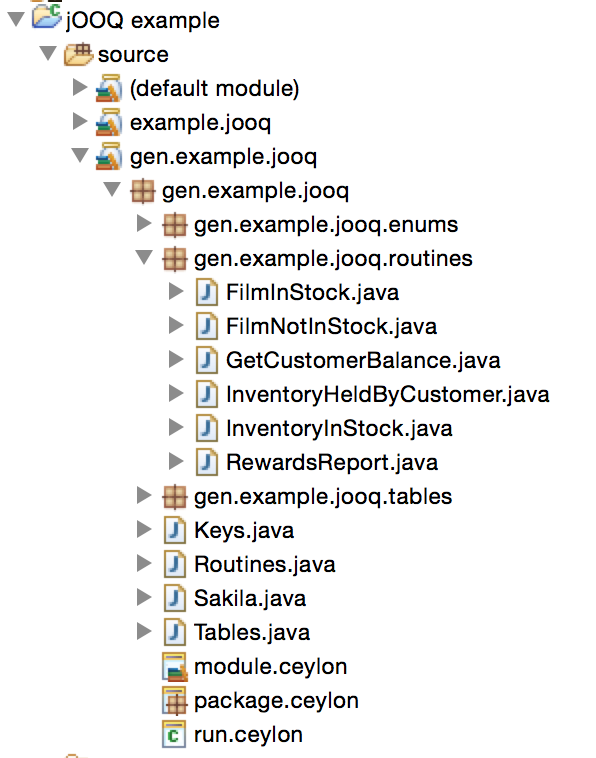
The only missing pieces are package.ceylon files that are needed in each subpackage, otherwise Ceylon’s type checker will not recognize them. It’s very easy to create them by hand, and they won’t be erased the next time we invoke the code generator.
Querying the database
We are now ready to produce actual code to query the database. To do that, we need to configure a data source. We will be using an object, since this is obviously a singleton:
object dataSource extends HikariDataSource() {

    shared void setup() {
        value mysqlDS = MysqlDataSource();
        mysqlDS.databaseName = "sakila";
        mysqlDS.user = "root";
        mysqlDS.setPassword("");

        dataSource = mysqlDS;
    }
}
We can now query the database, for example the table Actors:
shared void run() {
    dataSource.setup();

    value dsl = DSL.using(dataSource, SQLDialect.\iMYSQL);

    Result<ActorRecord> actors = dsl.selectFrom(Actor.\iACTOR).fetch();

    for (actor in CeylonIterable(actors)) {
        print("Actor ``actor.firstName`` ``actor.lastName``");
    }
}
We can easily iterate over a Result<ActorRecord> because it implements java.lang.Iterable, which can be adapted to a ceylon.language.Iterable using CeylonIterable.
Let’s see how more complex cases work:
value overdueRentals = dsl.select(
        concat(customer.\iLAST_NAME,
               DSL.val(javaString(" ")),
               customer.\iFIRST_NAME).as("customer"),
        address.\iPHONE, film.\iTITLE
    )
    .from(rental)
    .join(customer).on(rental.\iCUSTOMER_ID.eq(customer.\iCUSTOMER_ID))
    .join(address).on(customer.\iADDRESS_ID.eq(address.\iADDRESS_ID))
    .join(inventory).on(rental.\iINVENTORY_ID.eq(inventory.\iINVENTORY_ID))
    .join(film).on(inventory.\iFILM_ID.eq(film.\iFILM_ID))
    .where(rental.\iRETURN_DATE.isNull())
    .and(
        timestampAdd(rental.\iRENTAL_DATE, film.\iRENTAL_DURATION, DatePart.\iDAY)
        .lt(currentTimestamp())
    )
    .limit(5)
    .fetch();

for (rental in CeylonIterable(overdueRentals)) {
    print("Customer ``rental.value1()``, phone ``rental.value2()``,
            title ``rental.value3()``");
}
This time, I used import aliases to transform things like Rental.\IRENTAL into a user-friendly rental:
import gen.example.jooq.tables {
    Actor,
    Customer {
        customer = \iCUSTOMER
    },
    Address {
        address = \iADDRESS
    },
    ...
}
Making things more Ceylon-friendly
Now that we know jOOQ can be easily used from Ceylon, let’s see how we can improve things a little.
Getting rid of \i
The Ceylon specification indicates that properties must begin with a lowercase character, so when we try to access Actor.ACTOR, we actually have to escape it to Actor.\iACTOR. We saw that it can be worked around using import aliases, but it becomes tedious if we also have to alias fields like Actor.ACTOR.ACTOR_ID.
jOOQ provides nice extension points in its code generator, one of them is custom generator strategies:
[Generator strategies] can be very useful if you want to inject custom behaviour into jOOQ’s code generator with respect to naming classes, members, methods, and other Java objects.
This is exactly what we are looking for, we just have to override the default strategy to generate field names in camelCase:
public class CamelCaseStrategy extends DefaultGeneratorStrategy {

    @Override
    public String getJavaIdentifier(Definition definition) {
        return org.jooq.tools.StringUtils.toCamelCaseLC(definition.getOutputName());
    }

}
And use it in jooq-config.xml:
<generator>
    ...
    <strategy>
        <name>example.jooq.CamelCaseStrategy</name>
    </strategy>
    ...
</generator>
After having regenerated our classes, the previous sample code feels more natural and ceylonic:
...
.from(rental)
.join(customer).on(rental.customerId.eq(customer.customerId))
.join(address).on(customer.addressId.eq(address.addressId))
.join(inventory).on(rental.inventoryId.eq(inventory.inventoryId))
.join(film).on(inventory.filmId.eq(film.filmId))
.where(rental.returnDate.isNull())
...
Using Ceylon types (ceylon.language.*)
You may have noticed that things can get ugly when we have to “force” the use of a Java type instead of a Ceylon type, for example String:
dsl.select(
    concat(customer.lastName,
           val(javaString(" ")),
           customer.firstName)
)
javaString is a function that transforms a ceylon.language.String into a java.lang.String. Without it, jOOQ won’t recognize Ceylon types and instead will throw a nasty
Type class ceylon.language.String is not supported in dialect DEFAULTLuckily for us, jOOQ also allows us to use our very own custom types during code generation. We just have to implement org.jooq.Converter, then configure when to use this converter. Let’s see how we can map SQL strings to ceylon.language.String instances:
import java.lang {
    JString = String,
}

shared class StringConverter() satisfies Converter<JString, String> {
    shared actual String? from(JString? t) => if (exists t) then t.string else null;

    shared actual Class<JString> fromType() => javaClass<JString>();

    shared actual JString? to(String? u) => if (exists u) then javaString(u) else null;

    shared actual Class<String> toType() => javaClass<String>();
}
Next, we have to let the generator know that we would like to use this converter for every string in the database (in jooq-config.xml):
<database>
 ...
 <customTypes>
    <customType>
       <name>CString</name>
       <type>ceylon.language.String</type>
       <converter>gen.example.jooq.StringConverter
       </converter>
    </customType>
 </customTypes>

 <forcedTypes>
    <forcedType>
       <name>CString</name>
       <types>varchar</types>
    </forcedType>
 </forcedTypes>
</database>
Each varchar column will now be mapped to a ceylon.lang.String:

This can then be repeated for integers, datetimes, etc.
Gotcha
Until version 3.6.x, jOOQ forces us to use an identity that extends java.lang.Number. This has two consequences for us:
-
if we replace
java.lang.Integerwithceylon.language.Integer, the generated table classes will not compile becauseIdentity<R, ? extends Number> getIdentity()will be overriden with
Identity<R, ceylon.language.Integer> getIdentity()and
ceylon.language.Integerdoes not extendNumber -
if we delete those overriden methods, everything will compile and will mostly run as expected, except for a few cases like this one.
Fortunately, this will be fixed in jOOQ 3.7.0.
Conclusion
This article showed that integrating jOOQ in your Ceylon project requires very little effort, thanks to jOOQ that is flexible enough to let us customize naming strategies and data types. This also proves that the Java interop provided by Ceylon works very well and allows us to reuse existing Java frameworks.
The source code for this article is available in a sample project on GitHub.
If you plan on integrating jOOQ in your own Ceylon project, I also started ceylon-jooq-adapter which allows easy integration of jOOQ in your Ceylon project. It contains what was covered in this article, but other features will be added in the future.